How to Bypass a Ballast for LED Retrofit Kit Installation?

Time:2026-10-12 Author:Mason
0%

LED retrofits can reduce energy use, but bypassing a ballast changes the fixture’s electrical design. The U.S. Department of Energy’s 2020 U.S. Lighting Market Characterization reported that LED products represented approximately 48% of installed lighting stock. The International Energy Agency has also identified lighting efficiency as a major source of global electricity savings. These figures explain the market’s momentum, not permission to rewire carelessly.

This guide explains how to bypass ballast for led retrofit kit installation while keeping safety and verification central. A direct-wire Type B kit may require removing the ballast, identifying line and neutral conductors, and connecting the LED sockets according to the manufacturer’s wiring diagram. Power must be isolated, locked out, and tested with a reliable meter. The fixture should also meet applicable certification requirements, such as UL 1598 or an equivalent recognized standard. The wiring diagram may look simple. It is not.

Dr. Nadarajah Narendran, a respected solid-state lighting researcher, emphasizes a principle that belongs at the center of every retrofit: “An LED retrofit must be evaluated as a complete system, not merely as a replacement lamp.” That message is easy to overlook when a ballast appears old or noisy. In practice, installers must check socket condition, conductor insulation, grounding, enclosure space, and lamp compatibility. Manufacturer instructions remain decisive. A mistake here can create flicker, overheating, or an energized socket. Even experienced technicians should pause, verify, and reconsider assumptions before restoring power.
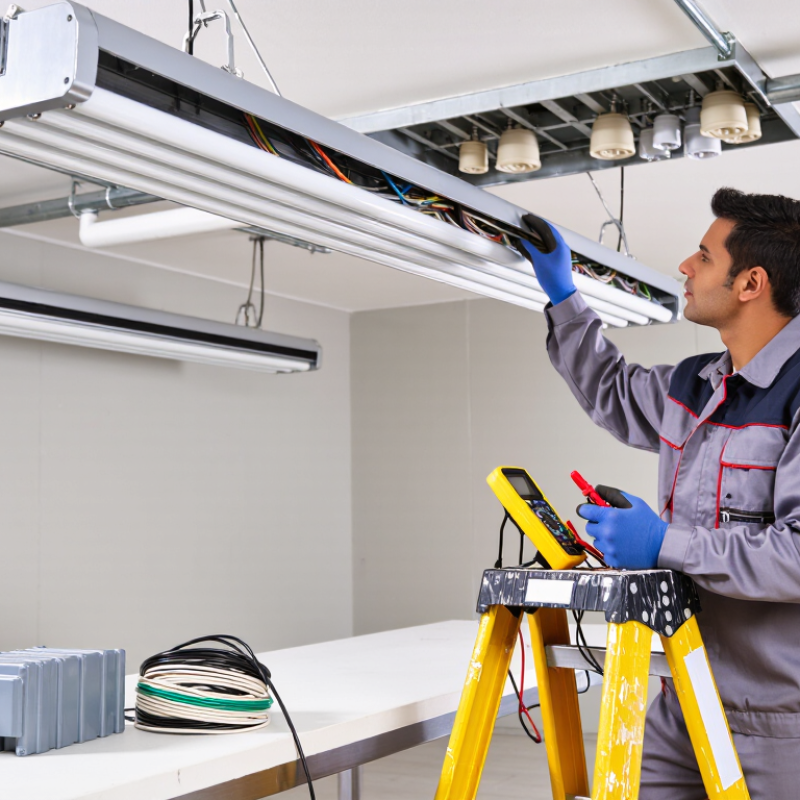
How to Bypass a Ballast for LED Retrofit Kit Installation?

Classify the Retrofit: Type B Ballast-Bypass LEDs for 120–277 V AC

How to Bypass a Ballast for LED Retrofit Kit Installation?

Classify the Retrofit: Type B Ballast-Bypass LEDs for 120–277 V AC

Type B LED retrofit kits remove the existing ballast from the circuit. The lamp then receives line voltage directly, commonly 120–277 V AC. This design reduces ballast losses and avoids future ballast failures. The U.S. Department of Energy reports that LEDs use at least 75% less energy than incandescent lighting and can last up to 25 times longer. However, those figures do not guarantee equal savings in every fluorescent replacement.

The wiring decision matters more than the lamp appearance. A qualified electrician should disconnect power, verify the circuit with a rated tester, and identify the hot and neutral conductors. The ballast must be isolated or removed according to the kit’s wiring diagram. Never assume both tombstones are harmless. Some installations require non-shunted sockets, while others need socket replacement. A loose terminal can create heat inside a crowded fixture.

Check the voltage, socket type, wire temperature rating, and enclosure clearance before energizing the circuit. The DesignLights Consortium’s technical requirements emphasize documented performance, electrical safety, and product testing for commercial LED systems. The International Energy Agency also identifies lighting as roughly 15% of global electricity use, making efficient retrofits worthwhile. Still, a bypass retrofit is not automatically the best choice. Existing wiring may be brittle, emergency circuits may need separate treatment, and local electrical rules can differ.

Measure twice. Document the final connections.

Verify Compatibility: 50/60 Hz Rating, Lamp Type, Sockets, and Wiring

Before bypassing a ballast for an LED retrofit kit, verify the kit’s electrical compatibility. Check whether it accepts 50 Hz, 60 Hz, or both. A frequency mismatch can cause flickering, overheating, or early failure. Confirm the listed lamp type, such as a compatible tube size and voltage range. Do not assume every LED tube uses the same wiring method.

Inspect the sockets closely. Some lamps require shunted sockets, while others require non-shunted sockets. Single-ended and double-ended designs also use different connections. Read the installation diagram carefully. Turn off the circuit breaker, lock it when possible, and verify that no voltage remains with a properly rated meter. A non-contact tester alone is not enough.

Keep the wiring clear and mechanically secure. The ballast must only be removed or bypassed when the retrofit instructions permit direct wiring. Preserve grounding and replace damaged sockets before energizing the fixture. I still recheck each conductor, even when the fixture looks familiar. It is easy to overlook one old connection. Test the lamp briefly, then inspect for flicker, unusual heat, buzzing, or a loose socket. Stop if anything seems wrong.

De-Energize the Fixture Using OSHA 1910.147 Lockout/Tagout Procedures

Before bypassing a ballast for an LED retrofit, de-energize the fixture under OSHA 1910.147 lockout/tagout procedures. Identify every energy source, including separate switches, emergency circuits, and shared panels. Turn off the correct disconnect. Apply your personal lock and a clear tag. Do not rely on a wall switch.

Release stored energy where applicable. Open the fixture only after confirming that moving parts and capacitors cannot create a hazard. Use a properly rated voltage tester on the circuit. Test the tester on a known live source before and after verification. Check line-to-line and line-to-ground points. The fixture must show zero energy.

Only a qualified worker should remove the ballast and alter conductors. Follow the retrofit instructions and the existing wiring condition. Inspect insulation, terminals, grounding, and the enclosure for heat damage. In field work, this step is often rushed. That is the mistake. A dark fixture does not prove isolation. Another circuit may still be energized.

Keep the lock in place while wiring changes are underway. When the installation is complete, confirm that tools and personnel are clear. Replace covers and secure all connections. Each worker should remove their own lock and tag. Restore power from a safe position, then check operation, flicker, grounding, and abnormal heat. If the wiring is unclear, stop and request evaluation from a licensed electrical professional.

How to Bypass a Ballast for LED Retrofit Kit Installation? - De-Energize the Fixture Using OSHA 1910.147 Lockout/Tagout Procedures
Work Phase Required Action Verification or Acceptance Criteria Primary Hazard Controlled Reference Point
1. Confirm qualifications Assign the work to a qualified person familiar with the fixture, circuit, electrical hazards, and the LED retrofit kit instructions. The worker can identify the energy source, apply the required controls, and interpret the kit wiring diagram. Electric shock, arc flash, incorrect wiring OSHA 29 CFR 1910.147(c)(7); applicable electrical safety requirements
2. Identify energy sources Review the panel schedule and fixture wiring. Check for normal, emergency, standby, control, and other possible sources of electrical energy. All sources feeding the fixture are documented before shutdown begins. Unexpected energization OSHA 29 CFR 1910.147(d)(1)
3. Notify affected employees Inform occupants, operators, and other affected employees that the lighting circuit will be shut down and locked out. Affected employees understand the shutdown timing and must not restore power. Unexpected re-energization and service disruption OSHA 29 CFR 1910.147(c)(9)
4. Shut down the circuit Open the designated disconnecting device using the established shutdown procedure. Do not rely only on a wall switch or fixture switch. The correct disconnect is identified and placed in the off position. Contact with energized conductors OSHA 29 CFR 1910.147(d)(2)
5. Apply lockout and tagout Apply an individually assigned lock and tag to the energy-isolating device. Use group lockout controls when more than one worker is involved. The lock and tag are securely attached and identify the authorized worker. Unauthorized restoration of power OSHA 29 CFR 1910.147(d)(4)
6. Release stored energy Allow capacitors and other components to discharge as required. Secure or block any stored mechanical energy and account for emergency lighting sources. Stored energy is released, restrained, or otherwise rendered safe. Residual electrical energy OSHA 29 CFR 1910.147(d)(5)
7. Verify zero energy Attempt normal operation, then use a properly rated test instrument to verify the absence of voltage at the fixture conductors. Return controls to the off position after testing. The test instrument proves de-energization and is checked before and after testing on a known live source. False zero-voltage assumption OSHA 29 CFR 1910.147(d)(6); applicable electrical safe-work practices
8. Inspect compatibility Confirm the retrofit kit is approved for ballast-bypass use, matches the socket configuration, voltage, lamp type, grounding method, and enclosure requirements. The existing fixture and the retrofit kit satisfy the kit manufacturer’s installation requirements and applicable electrical codes. Overheating, short circuit, lamp failure Retrofit kit installation instructions; applicable electrical codes
9. Remove or disconnect ballast With zero energy verified, disconnect or remove the ballast only as specified by the retrofit kit instructions. Do not leave unused energized leads inside the fixture. The ballast is electrically isolated or removed, and all unused conductors are properly terminated and secured. Shock, arcing, overheating Kit-specific wiring diagram; qualified-person work practice
10. Rewire and ground Wire the LED retrofit kit exactly as shown in its instructions. Maintain conductor insulation, polarity, strain relief, enclosure integrity, and equipment grounding continuity. Connections are secure, protected, correctly identified, and free from exposed conductive parts. Ground fault, fire, electric shock Kit instructions; applicable wiring and grounding requirements
11. Inspect and test installation Replace covers, confirm lamp seating, inspect for pinched wires, and perform required electrical and functional tests before normal operation. The fixture is mechanically complete, operates correctly, and shows no abnormal heat, noise, flicker, or odor. Fire, equipment damage, premature failure Retrofit kit instructions; site inspection procedures
12. Restore service safely Clear tools and personnel, reinstall guards, notify affected employees, remove locks and tags according to the written procedure, and re-energize the circuit. The authorized worker confirms the area is safe and verifies normal fixture operation after energization. Unexpected startup and personnel injury OSHA 29 CFR 1910.147(e)
Safety note: Ballast-bypass conversions can place line voltage directly at the lamp socket. Installation must be performed by a qualified person in accordance with the retrofit kit instructions, the facility’s written lockout/tagout program, and applicable electrical codes. Never work on an energized fixture.

Remove the Ballast and Rewire Line Voltage Under UL 1598C Instructions

How to Bypass a Ballast for LED Retrofit Kit Installation?

Removing the ballast can improve LED performance, but only when the retrofit kit allows ballast bypass. UL 1598C instructions should guide the entire conversion. Turn off the circuit, apply lockout procedures, and verify the wiring is de-energized with a properly rated tester. Do not rely on a wall switch alone.

Open the fixture and photograph the existing connections before changing anything. Disconnect and remove the ballast, then follow the kit diagram exactly. Usually, the incoming line conductor connects to the kit’s line input, while the neutral connects to its neutral input. Bond the equipment grounding conductor to the fixture body. Cap unused wires with approved connectors, and keep them away from sharp metal edges.

A small mistake can create a serious hazard. I would not assume every fixture uses the same wire arrangement. Some kits require single-ended wiring, while others require different lamp connections. Confirm the kit marking, socket condition, conductor temperature rating, and fixture compatibility. Replace damaged sockets or brittle insulation before energizing the fixture. It is easy to rush this step.

After rewiring, inspect every terminal for tightness and exposed copper. Check that the cover closes without pinching wires. Energize the fixture only after the installation matches the manufacturer’s diagram and applicable electrical requirements. If the instructions are unclear, stop and consult a qualified electrician. UL 1598C compliance depends on the complete listed conversion, not merely on removing the ballast.

Test Grounding, Polarity, Light Output, and Energy Use After Installation

How to Bypass a Ballast for LED Retrofit Kit Installation?

After bypassing the ballast, switch off power at the breaker and verify zero voltage with a tested meter. A qualified electrician should complete wiring changes when local rules require it. Confirm the retrofit kit’s wiring diagram before connecting line and neutral conductors. Do not rely only on wire colors, especially in older fixtures. Test grounding continuity from the fixture body to the grounding point. A secure ground should show a stable, low-resistance path.

Check polarity before installing the lamp or closing the housing. Line and neutral must connect to the correct terminals. I have seen loose neutral connections cause flickering that looked like a defective lamp. Turn power on briefly, then inspect for heat, buzzing, delay, or uneven illumination. Measure light output at the work surface with a lux meter. Compare readings with the previous lamp, using the same distance and room conditions. Light can feel brighter while still leaving dark corners. That deserves a second check. Measure actual wattage with a plug-in or circuit power meter, then compare it with the old system’s consumption. Calculated savings may differ from real use.

Tips: Retighten terminals, photograph the finished wiring, and label the disconnected ballast wires. Recheck grounding after the fixture has operated for fifteen minutes. If readings seem inconsistent, stop and investigate rather than guessing. A small wiring error can waste energy or create a serious hazard.

How to Bypass a Ballast for LED Retrofit Kit Installation?

Test grounding, polarity, light output, and energy use after installation.

Post-installation check Acceptable result Purpose
Grounding continuity Continuous protective-earth path Confirms the fixture body is bonded for fault protection.
Polarity Line and neutral correctly identified Prevents the switched conductor from being connected incorrectly.
Light output Compare measured lux at the same distance before and after Confirms that illumination remains suitable for the space.

The chart uses a reference comparison of a 36 W fluorescent fixture input and a 15 W ballast-bypass LED input at 3,000 operating hours per year. Annual energy use is calculated as watts × operating hours ÷ 1,000. Actual results depend on the installed lamps, supply voltage, fixture efficiency, and operating schedule. Turn off power and verify the circuit is de-energized before testing or rewiring.

FAQS

Can every LED retrofit kit work after ballast removal?

No. Confirm the kit permits direct wiring and ballast bypass. Check frequency, voltage, lamp type, and socket requirements. Do not assume similar tubes share wiring methods.

Should I check 50 Hz and 60 Hz compatibility?

Yes. Some kits accept both frequencies. A mismatch may cause flickering, overheating, or early failure. The label deserves a careful look.

How do socket types affect installation?

Some lamps require shunted sockets. Others require non-shunted sockets. Single-ended and double-ended designs use different connections. Inspect the socket before touching the wiring.

What safety steps should happen before rewiring?

Turn off the circuit breaker and apply lockout procedures when possible. Verify zero voltage with a properly rated meter. A non-contact tester alone is not enough. The circuit may still surprise you.

What should I do with the old ballast wires?

Remove the ballast only when the instructions allow it. Connect line and neutral exactly as shown. Cap unused wires with approved connectors. Keep them away from sharp metal edges.

How should the fixture grounding be handled?

Bond the equipment grounding conductor to the fixture body. Test continuity with a meter. The path should remain stable and low resistance. Never treat grounding as optional.

What should I inspect after energizing the fixture?

Watch for flickering, buzzing, unusual heat, delay, or uneven light. Check for loose sockets and exposed copper. Turn power off again if anything seems wrong. I sometimes recheck familiar fixtures, because familiarity can hide mistakes.

How can I confirm the retrofit really saves energy?

Measure wattage with a circuit power meter. Compare it with the previous system under similar conditions. Measure light at the work surface with a lux meter. A brighter ceiling can still leave dark corners. My calculation may be wrong, so real measurements matter.

Conclusion

This guide explains how to bypass ballast for led retrofit kit installation by replacing a fluorescent fixture’s ballast with direct line-voltage wiring for compatible Type B LED lamps. Before beginning, confirm that the retrofit kit is designed for 120–277 V AC, supports the fixture’s 50/60 Hz supply, matches the intended lamp type, and is compatible with the existing sockets. Carefully review the kit’s wiring diagram and installation requirements before making any changes.

Power must be disconnected and secured using appropriate OSHA 1910.147 lockout/tagout procedures, and only qualified personnel should perform the work. After removing the ballast, rewire the fixture according to applicable UL 1598C instructions, maintaining proper grounding, polarity, wire protection, and socket connections. Once installation is complete, inspect all connections before restoring power. Test the fixture for safe operation, even light output, correct switching, abnormal heat, and expected energy use. If compatibility or wiring is uncertain, stop and consult a licensed electrical professional.

Mason

Mason

Mason is a seasoned marketing professional with a deep expertise in the company's offerings and a passion for driving brand awareness. With a strong background in digital marketing strategies, he has an innate ability to connect with diverse audiences and effectively communicate product benefits.......